
How to Create a Custom Contact Form in Shopify
There are three ways to make a custom contact form in Shopify. Use your theme's Contact form section as it is, add your own text boxes to it with a small theme code change, or build the form in an app such as Formlane, with no code, choice questions and an inbox for every message.
Which one fits depends on what you need to ask. Here are the steps for each, starting with the free built-in form.
Way 1: Your theme's contact form
Shopify themes come with a contact page and a Contact form section. In Dawn, the form has four boxes: Name, Email, Phone number and Comment.
- In your Shopify admin, go to Online Store › Pages and open your contact page, or press Add page and call it Contact.
- Under Theme template, pick contact, then press Save.
- Go to Online Store › Themes, press Customize and open the contact page. Change the form's heading and colors in the Contact form section.
- Add the page to your menu in Content › Menus.
When a shopper presses Send, Shopify emails the message to your store. It is free and works with no setup. You cannot change the boxes from the theme editor, though, and there is no list of messages in your admin: each message lives only in your email.
Way 2: Add your own boxes with theme code
Each box in the contact form has a name inside contact[...], and Shopify puts that name and the answer in the email you get. So you can add a box by copying one that is already there. In Dawn, the form is in sections/contact-form.liquid.
- Go to Online Store › Themes, press … next to your theme and choose Duplicate. Work on the copy.
- On the copy, press … and choose Edit code, then open
sections/contact-form.liquid. - Find the Phone number box and add a new box after it, for example:
<div class="field">
  <input class="field__input" type="text" id="ContactForm-order"
    name="contact[Order number]" placeholder="Order number">
  <label class="field__label" for="ContactForm-order">Order number</label>
</div>- Save, look at the contact page on the copy, then publish the copy when it works.
Shopify's guide to editing theme code explains backups and how to undo a change.
This works for a few text boxes. It has limits worth knowing before you start:
- Only text reaches you. A file box will not work, because the contact form cannot take files.
- Every box shows every time. There is no way to show a box only for some answers without writing JavaScript.
- Your change lives in that copy of the theme. When you update the theme, you add it again.
- Messages still arrive only by email, with no inbox and no spam tab.
Way 3: Build the form in Formlane
Formlane is a Shopify app we make. You build the form in the app with no code, and every message is saved in an inbox inside your Shopify admin before any email goes out. One form is free.
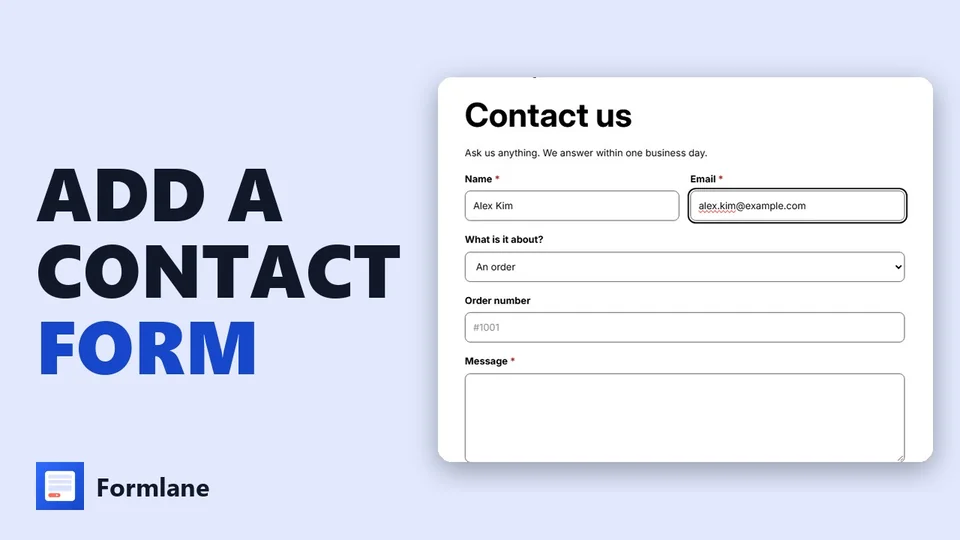 Play the video: How to Add a Custom Contact Form to Shopify (2026 Tutorial)
1. Pick a ready form
Install Formlane. Home shows three ready forms: Contact us, Wholesale inquiry and Return request. Tap Contact us. The form page opens with every question filled in, and you can change all of it.
2. Make the questions yours
Press Add a question and pick its type: short answer, long answer, email, phone, number, date, a drop-down list, pick one, pick any, file or photo, or an agree box. Tick Must be filled in where an answer is needed, add a hint inside the box, and choose Whole row or Half row. Drag a question or use the arrows to move it.
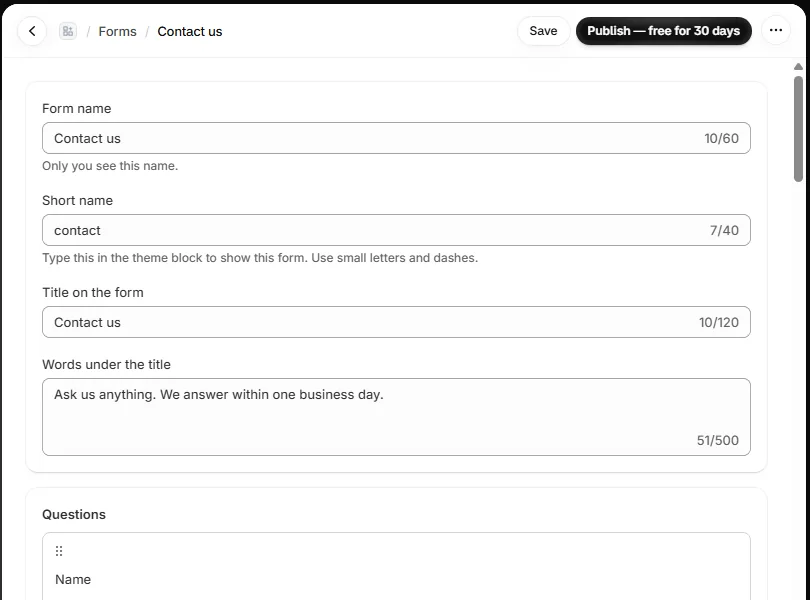
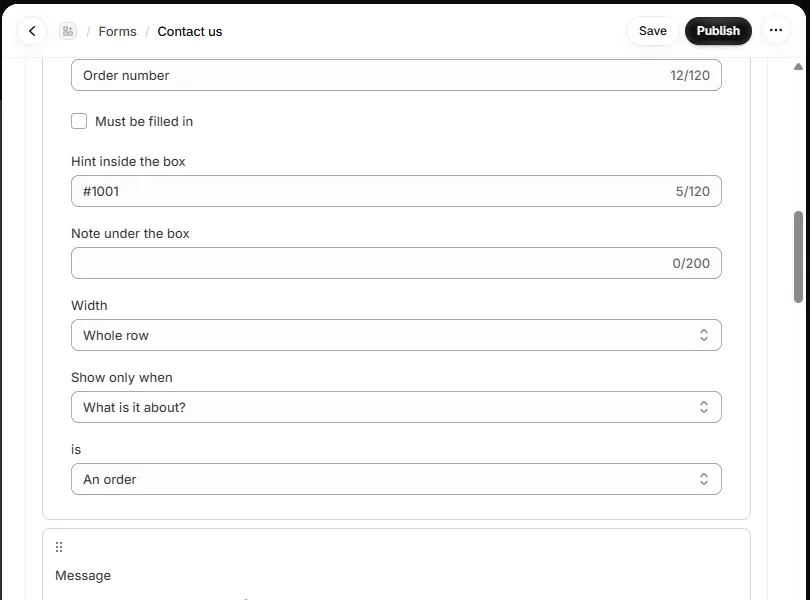
To show a question only for some answers, use Show only when. For example, an Order number box can show only when the topic is An order. This is part of Pro.
3. Set the look and the emails
Under Look, pick the text size, form width, space between questions, corners and button colors. The form uses your theme's font. Under Emails, type where new message alerts go, or leave it empty to use your store email.
4. Publish and add it to your contact page
Press Publish. A form that uses only Free parts goes on your store at no cost. Then, on Home, press Add it to my contact page. Your theme editor opens on the contact page with the Formlane form block added. Press Save.
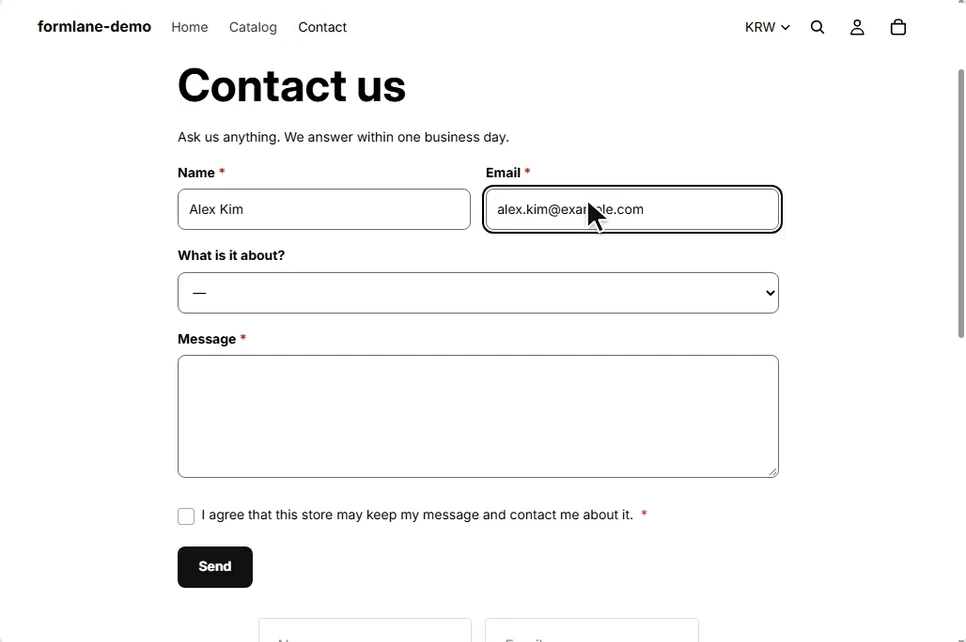
If the page now shows two forms, hide your theme's own one: press Open the theme editor, click the eye next to Contact form, and press Save. Formlane's home page tells you when shoppers see two forms.
5. Read and answer messages
Every message lands in your Inbox, sorted into New, Answered, Done and Spam. Press Reply by email to answer from your own mail app; the message is marked as answered. Likely spam goes to its own tab and is never emailed to you.
Which way fits
| Theme form | Theme form + code | Formlane Free | Formlane Pro | |
|---|---|---|---|---|
| Cost | Free | Free | Free | $7.99 a month |
| Your own questions | No | Text boxes | Yes | Yes |
| Drop-down, pick one, date | No | With more code | Yes | Yes |
| File or photo | No | No | No | Yes |
| Show a question only when needed | No | With JavaScript | No | Yes |
| Where messages go | Inbox, then email | Inbox, then email |
Pro is $79.90 a year, or $17.99 a month on Shopify Plus. The first time you use a Pro part, Shopify asks you to approve Pro, and the first 30 days are free. See Plans and trial.
Questions people ask
Where do Shopify contact form messages go?
The built-in form emails each message to your store. Formlane saves each message in an inbox in your Shopify admin first, then sends you an alert email.
Can I add a drop-down or a date to Shopify's contact form?
With theme code, yes, as long as the answer is text. Formlane has drop-down lists, pick one, pick any, dates and numbers built in, with no code.
Can I have a different form on another page?
Yes. Add the Formlane form block to any page in the theme editor and type the form's short name in it. The Free plan shows one form on your store; Pro allows up to 24.
Will the form match my theme?
Formlane uses your theme's font. You set the size, width, corners and button colors under Look.